20% Off All-On-4
Life After All-on-4 Dental Implants: Recovery, Diet, and Daily Maintenance
May 12, 2026
/
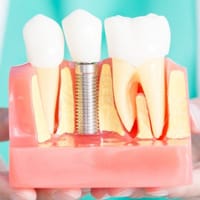
Getting All-on-4® dental implants is a life-changing decision that permanently restores the function and aesthetics of your smile. However, knowing what to expect after you leave the dental chair is just as important as the surgery itself.
Whether you have just undergone the procedure or are researching your options at Dentiq Dentistry in Houston, understanding the recovery timeline, dietary adjustments, and long-term maintenance will ensure your new smile lasts a lifetime. Here is your complete clinical guide to life after All-on-4 implants.
The First 72 Hours: Managing Your Immediate Recovery
The first few days following your All-on-4 surgery are critical for proper healing. Because the implants are surgically placed into your jawbone, your body needs time to begin the osseointegration process (where the bone fuses to the titanium posts).
During the first 72 hours, you should focus on rest and minimizing inflammation. Here is what to expect and how to handle it:
-
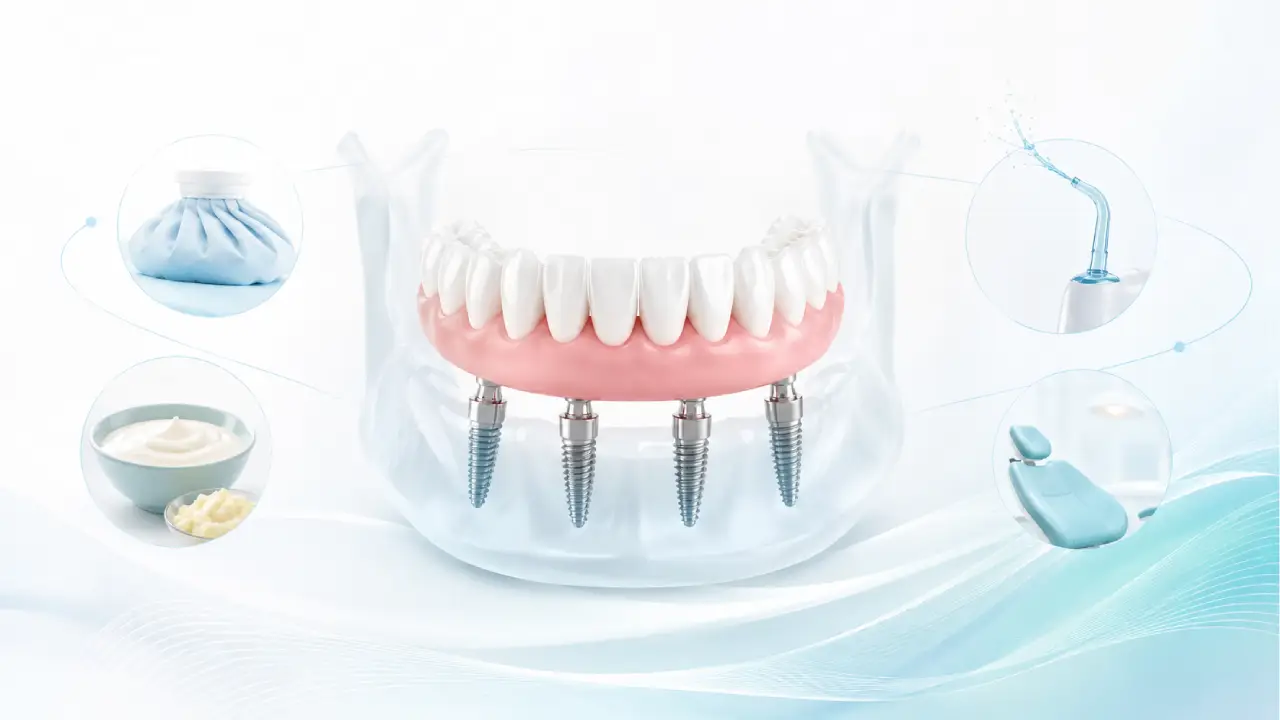
Swelling and Bruising: Mild to moderate swelling around the jaw, cheeks, and even under the eyes is a normal inflammatory response. Apply an ice pack to the outside of your face for 15 minutes on and 15 minutes off during the first 24 hours.
-
Bleeding: Slight oozing at the surgical site is common on the first day. Bite down gently on the sterile gauze pads provided by your dentist until the bleeding stops.
-
Pain Management: Discomfort usually peaks within the first 48 hours. Take all prescribed pain medications or recommended over-the-counter anti-inflammatories strictly as directed by your oral surgeon.
-
Rest: Avoid elevating your heart rate. No heavy lifting, bending over, or vigorous exercise for at least a week, as this can trigger throbbing and bleeding.
The All-on-4 Healing Diet: What You Can (and Cannot) Eat
Your provisional (temporary) teeth will be attached to your implants immediately, allowing you to leave the clinic with a full smile. However, these temporary prosthetics are not designed to withstand heavy chewing forces while the implants integrate with your bone.
For the first 6 to 8 weeks, you must strictly adhere to a mechanical soft food diet. Chewing hard foods prematurely can disrupt the implants, leading to surgical failure.
| Food Category | ✅ Safe to Eat (Soft Diet) | ❌ Strictly Avoid |
| Proteins | Scrambled eggs, flaky baked fish, tofu, smooth peanut butter, protein shakes. | Tough steaks, jerky, crunchy fried chicken, nuts, seeds. |
| Fruits & Veggies | Applesauce, mashed potatoes, steamed carrots, smoothies (no seeds). | Raw apples, raw carrots, corn on the cob, berries with small seeds. |
| Carbs & Grains | Overcooked pasta, oatmeal, soft breads (no crust), grits, mashed sweet potatoes. | Crusty bread, pizza crust, popcorn, hard taco shells, chips. |
| Snacks & Dairy | Yogurt, cottage cheese, pudding, ice cream, soft cheeses. | Sticky candies, caramel, chewing gum, hard candies, ice cubes. |
Long-Term Maintenance: How to Clean Your New Smile
Once your implants have fully healed and your permanent, custom zirconia arch is placed, your dietary restrictions will be lifted. However, your hygiene routine must remain rigorous. While your new teeth cannot get cavities, the gum tissue around the implants is still susceptible to infection (peri-implantitis), which can cause bone loss and implant failure.
To keep your All-on-4 implants pristine, incorporate these steps into your daily routine:
-
Use a Water Flosser: This is the most crucial tool for All-on-4 patients. A water flosser (like a Waterpik) used on a low-to-medium setting will flush out food particles and plaque trapped in the small space between your prosthetic arch and your natural gums.
-
Brush Twice a Day: Use a soft-bristled toothbrush and a non-abrasive toothpaste. Brush the front, back, and chewing surfaces of the teeth, paying special attention to where the prosthesis meets the gumline.
-
Use Super Floss: Standard dental floss won’t work for a full arch. Use specialized “Super Floss” or floss threaders designed for implants to clean under the bridge effectively.
-
Antibacterial Mouthwash: Rinse daily with an alcohol-free, antibacterial mouthwash to keep oral bacteria in check and soothe your gum tissue.
The Importance of Professional Checkups
Your All-on-4 implants require professional maintenance to ensure long-term success. You should visit your dentist every 6 months for a comprehensive exam and professional cleaning.
During these visits, your dental team will:
-
Take panoramic or 3D X-rays to verify that the bone levels supporting the implants remain strong and healthy.
-
Use specialized, non-scratching instruments to remove any hardened calculus (tartar) from the titanium posts and the prosthetic arch.
-
Check the bite alignment to ensure even pressure is being distributed across the implants.
-
Occasionally unscrew the arch for a deep cleaning, if clinically necessary.
Still Have Doubts? Why the All-on-4 Process at Dentiq Dentistry is Easier Than You Think
It is completely normal to feel a bit of “recovery anxiety” when reading about dietary restrictions and healing times. However, remember that these few weeks of adjustment are a small bridge to a lifetime of stability and confidence.
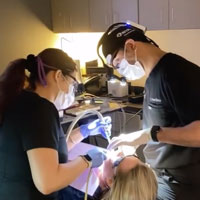
At Dentiq Dentistry, we prioritize your comfort from the very first 3D scan to the moment you bite into your favorite food without a second thought. We don’t just deliver a new prosthesis; we provide an expert-guided experience so you never have to guess what comes next. If you are doing this research because you want a permanent change but are nervous about the procedure, let’s talk. We will show you exactly how predictable, safe, and rewarding this path to your new smile in Houston can be.
Share this Post